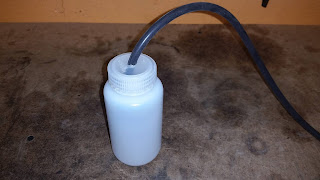
DIY Coolant Overflow / Reservoir Tank
How it Works
When a liquid is under pressure the boiling point rises. When things are heated they expand. The coolant system is a sealed system, and when the coolant system heats up, this automatically generates pressure, because of this expansion. This is good, to a point. The hotter it gets, the more pressure it builds, and the higher the boiling point of our coolant. We cant let the system get to hot (Not much over 235F) or build to much pressure because, the rubber hoses that the coolant runs through might fail or we might just end up overheating altogether and causing more extreme damage (most likely).
So what happens when the coolant system builds to much pressure?
The cap has a built in pressure valve that lets off the excess pressure. This excess pressure or excess coolant that has now expanded and needs to leave the coolant system needs some place to go other than the ground. This is where the Coolant tank or Coolant expansion reservoir tank comes in. The coolant is captured in this tank.
What happens when the Coolant system cools down?
When the coolant system cools down, the system creates a low pressure area (lower than atmospheric pressure). This void or vacuum in the coolant system draws the coolant back out of the tank and back into the system. (You physicist will say the atmosphere pushes the coolant back into the coolant system.)
Now you see why we just don’t dump the coolant out on the ground. We need it later when the system cools back down, so we have a sufficient amount of coolant when we go back out.
Now that we know how it works, LETS BUILD A LIGHT WEIGHT VERSION.
Materials list
- 2 1/4″ 304 Stainless Steel Vibration-Damping Loop Clamps with Silicon Cushion or maybe I should use Zip Ties (Probably most common method)
- Durable Nylon Tight-Seal Barbed Tube Fitting, 90 Degree Elbow, 1/4″ Tube ID x 1/8 Male Pipe Size This is a 10 pack so I only need one pack. $7.50
- 8oz Wide Mouth Plastic Shipping Bottle $6
- Loctite General 2 part Adhesive I use this 2 part adhesive around the house and shop so I can justify the price tag.
- High-Temperature Silicone Rubber Tubing 3/16″ID-3/8″OD With your choice of color 10ft is more than enough and will do anywhere from 2 or 3 bikes. There is no shame in using the old tubing that came with the bike, so this $13 item is optional.
Below is the most common way to build your own coolant reservoir. There is nothing wrong with doing it this way, but I myself have a problem with it. When the coolant system does boil over and the reservoir is filled or maxed out. Where does the coolant go? The coolant will go all over the place and possibly onto the racing surface This will cause issues for you and the guys behind you. Not only is there the possibility of leaking onto the track, and shutting it down for a bit. Allowing the coolant to blow past the hose and go where it wants will also make a mess of your bike causing coolant to go everywhere. I feel there is a better way to control coolant overflow.


Comments
Post a Comment