Garage Finishing and Sheeting
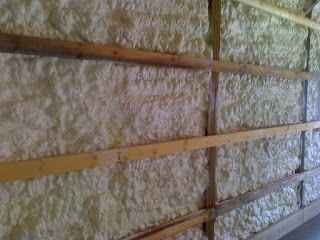
After the Garage sat all winter, spring came and it was time to get back to work. I had decided over the winter and after doing hours of research, I was going to get a contractor to insulate it with spray foam.
Nailers for the sheeting were installed before the contractor showed up. All preparation work needs to be done before they come to spray the foam. If you choose to go this route, ask your contractor what he would like done before he shows up to spray the foam.
I chose to go with 1/2″ OSB (I might drywall it later). The reason for the OSB is that I can drive a screw anywhere to hang a picture or tools. I also hung the OSB with the rough poris side out and the waxed side twords the insulation. The reason for this is that the rough side will give a sort of texture giving a more uniform look, and the paint will adhere better.
I do wish I would have documented putting the ceiling in a bit better. I built my own panel lift out of 2x2s and lifted each panel myself and fastening it. Most of the panels were 18ft 3inch long. The 3 inches allowed for overlap for me to screw into the trusses that are 6ft on center. When I was finished with my home made panel lift, I disassembled it and used it for other things like shelves and benches. The lights I used are nothing fancy, just some 4ft long $7 fixtures from Menards. It still cost me a pretty penny for all the fixtures, but I waited until menards had their 11% off sale and got them that way. Still has a long way to go but every bit I do gets it more efficient and cozier.


Comments
Post a Comment